ENGINEERING WATER DISTRIBUTION
Water Supply, Treatment and Circulation
Making a Prototype
The Design and Building Process
Research:
First we researched other types of portable filtration devices and found that many of the systems were bulky, expensive or did not have buckets (and so did not constitute a complete system). Others contained buckets that could slot into one another but that resulted in a system the size of the bucket, which is still rather large (for example the HLS-1, http://www.bdavidwater.com/disaster-relief-hls.html). Therefore we decided to design a filter system that was simple to use, easy to move and could be produced cheaply.
Brainstorming
Before coming up with the design we made a brainstorm of different ideas for how to fold the system and how the prototype could be made with the materials available to us.
The design needed the buckets to be waterproof, for the actual design this would not be as much of an issue as the box could be made in a factory. However, we do not have the technology to form a box from the correct plastic and so the prototype had to be made from the materials we had, and we had to build the boxes from flat sheets as we could not form a box by vacuum forming because it would not be able to be made flexible enough for the design.
Origami inspiration
The inspiration for the folding design came from an origami model. This model is a line of cubes that open and close when the sides are pushed. However this model is made from 6 strips of paper and so has holes in it. The origami model was then combined with a model of a square box. This made a box with no holes in so it could store water, and could fold flat by twisting.

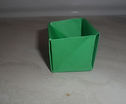

Finding Materials
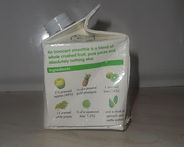
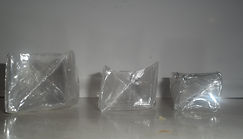
The materials needed to be strong, tough and waterproof. We therefore tried making the boxes from juice cartons, however these were too flimsy. Then we tried a plastic bottle, this time it was too stiff and difficult to find in a square. Then we decided to try the plastic the used to laminate paper. We put the two plastic sheets through the laminator without any paper in the middle of them and folded this into some plastic boxes, using two different origami models, and also using hot glue with one (which did not work as it prevented it from staying flat).
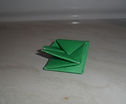
We decided to use the second model as it meant that there were not too many sheets folding over one another and it used less material.
When making the small designs to test the folds we had found that the plastic kept unfolding. So we decided to try reinforcing the plastic with chicken wire.. This was a bit harder to fold into place, however was a lot more sturdy.
At this point we also noticed that a slight alteration to the folds we were making made the design much more likely to stay and also was much easier to fold flat. The alteration was, when folding from a flat square, to fold the corner triangle to one side and staple it at the top, rather than flattening it along the crease line and bending a corner over the edge. Although in origami the staples were not meant to be used and so the extra folds were needed to fasten the box, in my design the staples meant that the box was now more securely fastened and provided a diagonal line to base the next folds on.
The box we had created was now too strong to fold flat and was also rather sharp (due to the chicken wire). So we decided to try plain laminate plastic with the new folds. This worked well and we decided to keep this design and type of plastic. For the rest of the model we decided to use foam board as it was light, quick and easy to work with.


Testing Folds
Two of these paper models were then built and glued one on top of the other to test the folding system that would be used in the design.


Deciding on the Exact Design
Then we drew out the design on “Sketchup” and by hand the plan of what we were going to build as a prototype. Because this prototype was meant to test the folding mechanism and the overall design we chose to leave out the supports that would be needed for a large design and the different filter slots (as the design was being made out of foam board and laminate plastic and is a smaller version, meaning making the filter slots would be very difficult and not very beneficial for the model).
Building a Box
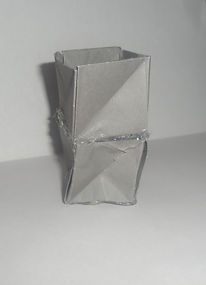
We then made a large version of the box with the new design and plastic.
Building the Prototype
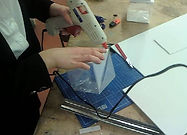
We cut out two 30cm by 30cm squares of laminated plastic (that had gone through the laminator) and folded it along the crease pattern we had designed. We then stapled the sides to form a box, Next we flattened the box by folding diagonally along each side face. Then we cut out the foam board and used a hot glue gun to attach the foam together and attach it to the plastic. We did this for both the top and bottom box (making sure we had cut a hole in the bottom of the top box). We then built the filter box from the foam. While building the joints we made sure they were tight fittings and could withstand the twisting motion needed to open the boxes.

Testing the Box
We then tested the ability of the box design to make sure it folded well and reliably.


The videos to the right are the videos of people who had not opened the design before, opening the design.
Testing the Prototype
The finished prototype was then unfolded and folded a few times and some arrows were drawn on the lid to aid understanding of the mechanism before handing it to a few other people to test it. The bottom bucket was then filled with water to see if it was watertight.
Analysis of Prototype
Overall, the prototype shows that the folding design works and that the buckets are both strong and waterproof. However, the design also needs to be easy to use and so would need diagrams and instructions on the lid to ensure people know how the open it. The video of other people opening the system shows that it is reasonably easy but it would still need explaining. Also this prototype is not an exact representation of what the design would be like and so the design would need further testing with the correct proportions and materials.

